


Hiking Mount St. Helens: What to Know Before You Go
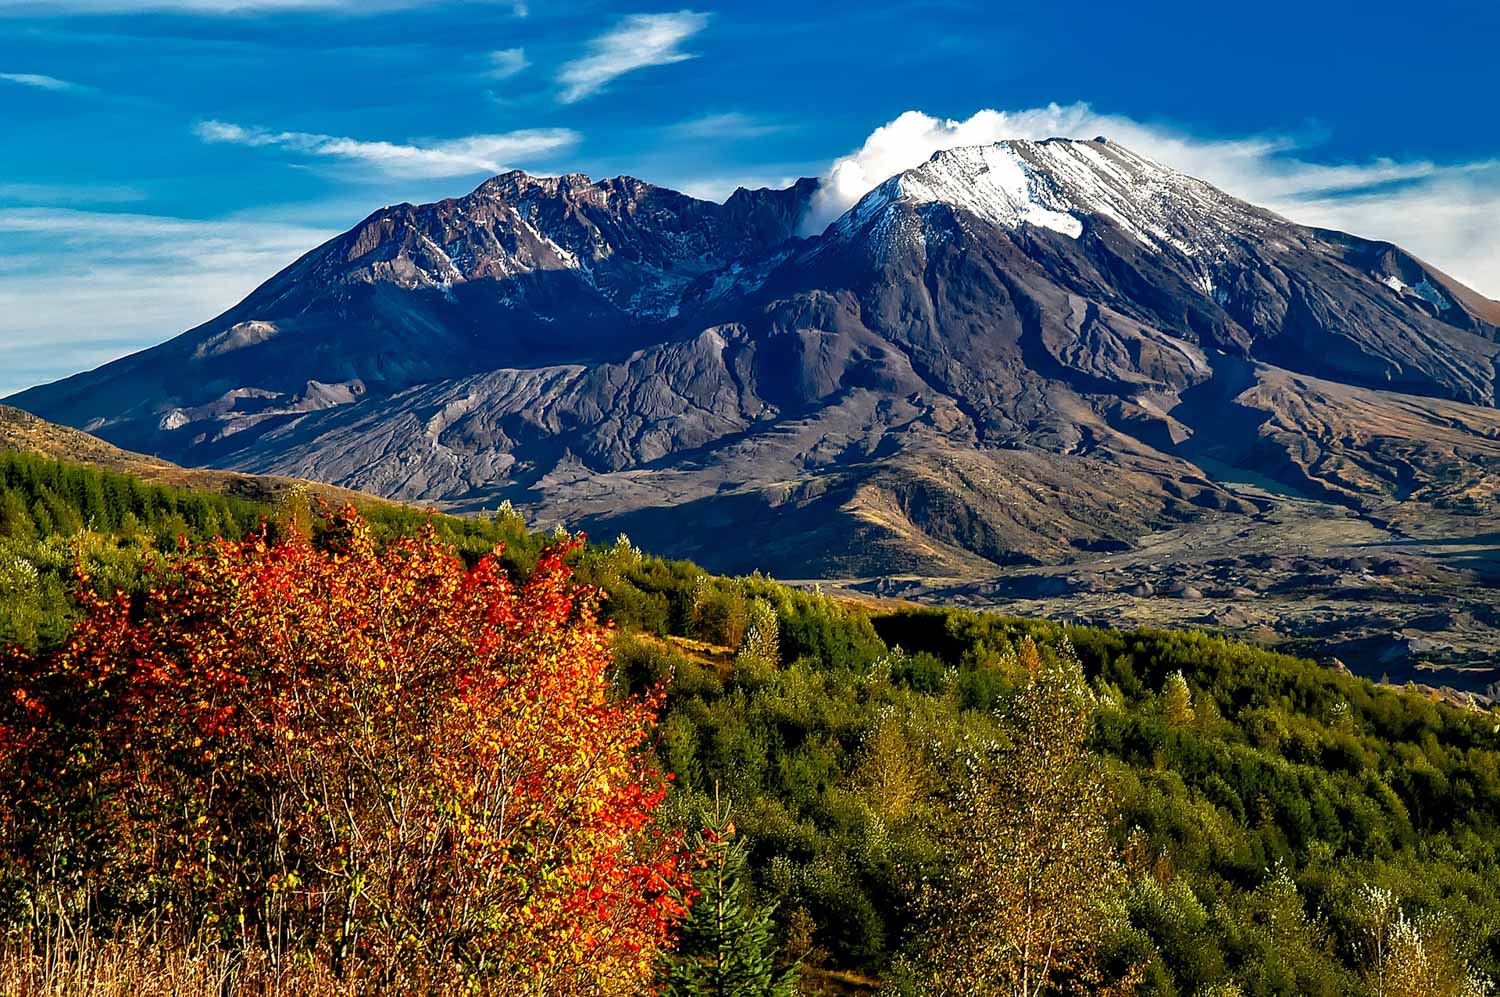
Climbing Mount St. Helens is a demanding, rewarding adventure in Washington’s Cascade Range. The route leads from forested slopes to open volcanic terrain, with sweeping views of the surrounding mountains and a close-up look at the landscape reshaped by the 1980 eruption. It is not a maintained trail all the way to the summit, so good preparation and careful attention to conditions are essential.
Know the Route
The most popular summer climbing route is Monitor Ridge, approached from Climbers Bivouac. The round trip is roughly 10 miles, with about 4,500 feet of elevation gain. Many climbers need 8 to 12 hours, though timing varies with fitness, weather, route conditions, and rest breaks.
The lower portion follows established paths through forest. Higher up, the route crosses exposed volcanic slopes, loose rock, and areas that may hold snow or ice. Route markers and cairns can help, but visibility may be poor in clouds. The summit area is exposed, and the crater rim is unstable in places. Stay on the permitted route and never enter the crater.
Permits and Planning
A climbing permit is required for travel above 4,800 feet. Permits are managed through Recreation.gov, and the number available may be limited, particularly during the busier climbing season. Check the current rules, dates, quota, and access information before making plans. A permit does not guarantee favorable weather or safe conditions.
Before leaving, review the latest information from the Mount St. Helens National Volcanic Monument and local land managers. Check the weather forecast, road and trailhead access, snow conditions, and any closures or advisories. Conditions can change quickly, even during summer.
What to Bring
Prepare for a long day in exposed, changeable terrain. Useful essentials include:
- Plenty of water and high-energy food
- Sturdy hiking boots with good traction
- Layered clothing, including rain and wind protection
- Sun protection, such as sunscreen, sunglasses, and a hat
- A map or offline navigation tools and a headlamp with spare batteries
- A first-aid kit and emergency communication device where appropriate
- Season-appropriate equipment for snow and ice, along with the skills to use it
Do not assume that equipment used on a previous hike will be suitable for current conditions. Snow travel can require an ice axe and traction devices, and these tools are only useful when you know how to use them safely.
Safety and Leave No Trace
Start early, set a turnaround time, and be willing to turn back if weather, fatigue, or route conditions become unsafe. The summit is not worth risking an injury or getting caught in deteriorating conditions. Tell someone your plan and expected return time, and avoid hiking alone if you are not experienced in remote, high-elevation terrain.
Stay on the established route, pack out all trash, and avoid disturbing plants, wildlife, and historic or geologic features. Volcanic rock can be loose, and falling rocks may endanger people below; give other climbers space and use extra care on steep slopes.
Is Mount St. Helens the Right Hike for You?
This climb is best suited to hikers who are comfortable with a long, strenuous day, substantial elevation gain, exposed terrain, and changing mountain conditions. Those seeking an easier visit can explore other trails and viewpoints in the Mount St. Helens area without attempting the summit.
With a permit, careful planning, suitable gear, and a flexible mindset, a Mount St. Helens climb can be an unforgettable way to experience one of the Pacific Northwest’s most remarkable volcanic landscapes.
8 Essential Tips for Hiking Mount St. Helens
- Get a climbing permit before hiking above 4,800 feet.
- Check current alerts and weather before you go.
- Start early to allow plenty of daylight.
- Bring sturdy boots, layers, food, and extra water.
- Carry a map, compass, and charged phone or GPS.
- Expect loose rock, ash, and steep terrain near the summit.
- Turn back if weather or conditions become unsafe.
- Pack out all trash and follow current route rules.
Get a climbing permit before hiking above 4,800 feet.
Before hiking above 4,800 feet on Mount St. Helens, make sure you have a valid climbing permit. Permits are required to manage visitor access and protect this remarkable volcanic landscape, and availability may be limited on popular dates. Check current requirements and reserve through the official permit system before your trip; a permit does not replace the need to check weather, route conditions, and closures.
Check current alerts and weather before you go.
Before heading out for a Mount St. Helens hike, check current alerts, access updates, and the mountain weather forecast. Conditions can change quickly, and snow, strong winds, poor visibility, road closures, or route advisories may affect your plans and safety. Review information from the land managers on the day of your hike, and be ready to adjust your route or turn back if conditions are unfavorable.
Start early to allow plenty of daylight.
Start your Mount St. Helens hike early to give yourself plenty of daylight for the long climb and descent. An early start also leaves more time for breaks, changing conditions, and unexpected delays, while helping you avoid rushing on steep, exposed terrain. Check sunrise and sunset times before you go, and set a turnaround time so you can descend safely even if you don’t reach the summit.
Bring sturdy boots, layers, food, and extra water.
For a Mount St. Helens hike, bring sturdy, well-broken-in boots with reliable traction to handle rough, loose terrain. Dress in layers so you can adjust to changing temperatures and wind, and pack enough food to keep your energy up throughout the long climb. Carry extra water, too—there may be few opportunities to refill along the route, and staying hydrated is essential.
Carry a map, compass, and charged phone or GPS.
Carry a paper map and compass, along with a fully charged phone or GPS device, when hiking Mount St. Helens. Cell service can be unreliable, and changing weather or low visibility can make it difficult to follow the route. Download maps for offline use, keep your devices protected from moisture and cold, and know how to use your navigation tools before you set out.
Expect loose rock, ash, and steep terrain near the summit.
Near the summit of Mount St. Helens, the terrain becomes steep and exposed, with loose rock and volcanic ash that can shift underfoot. Take short, deliberate steps, leave space between hikers to reduce the risk of dislodging rocks, and use trekking poles if they help you stay balanced. Wear sturdy footwear with good traction, watch for changing conditions, and turn back if the route feels unsafe.
Turn back if weather or conditions become unsafe.
On a Mount St. Helens hike, reaching the summit should never take priority over safety. Weather can shift quickly, and poor visibility, strong winds, lightning, snow, or unstable footing can make the route dangerous. Set a turnaround time before you start, watch conditions as you climb, and head back if the weather worsens or anyone in your group feels unwell or unprepared. Turning around is a smart decision—and helps ensure everyone gets home safely.
Pack out all trash and follow current route rules.
Pack out everything you bring on your Mount St. Helens hike, including food wrappers, tissues, and other small items. Leaving trash behind can harm wildlife and spoil the fragile volcanic landscape for others. Follow current route rules, stay on permitted paths, and check official land-management updates before your trip, since closures and access requirements can change with conditions.


