

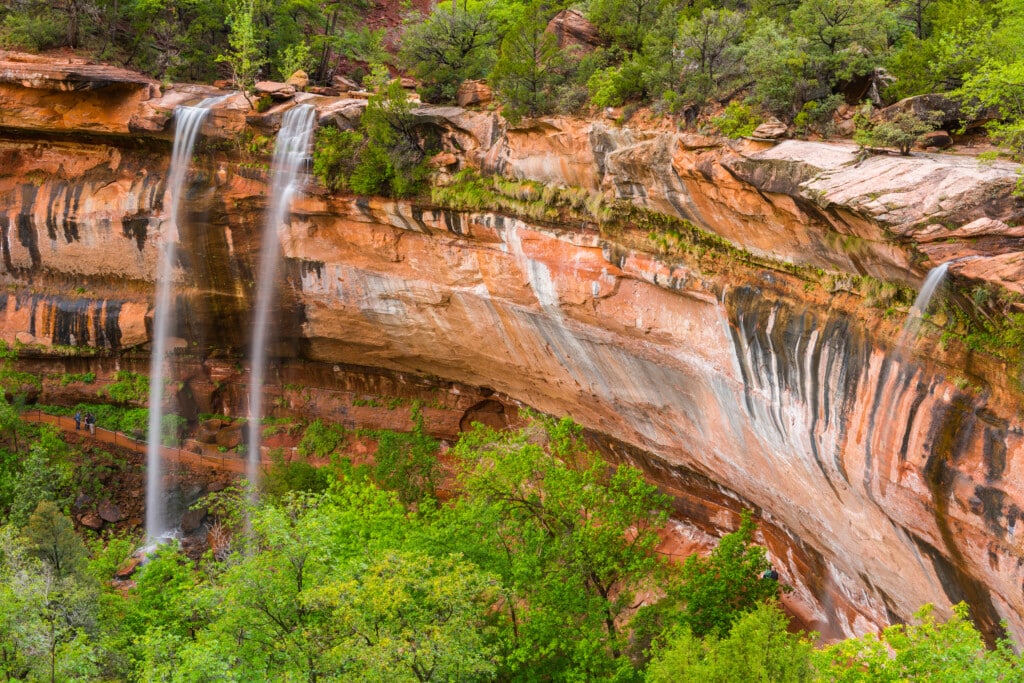

Emerald Pools Trail: A Zion National Park Favorite
Emerald Pools Trail is one of the best-known hikes in Zion National Park, Utah. The route leads through red-rock canyon scenery to a series of natural pools and seasonal waterfalls. With options ranging from a short, relatively easy walk to a longer, steeper hike, it offers a memorable way to experience Zion’s landscape at different levels of difficulty.
What to Expect
The trail is usually described in three sections: Lower, Middle, and Upper Emerald Pools. The Lower pool is the most accessible destination, while continuing to the higher pools involves more distance, elevation gain, and uneven terrain. The exact route and trail conditions can change, so check current National Park Service information before setting out.
- Lower Emerald Pool: A popular, relatively short option reached from the Zion Lodge area. The path includes paved sections, though conditions and accessibility may vary.
- Middle Emerald Pools: A longer hike that climbs above the canyon floor and offers broad views of the surrounding cliffs.
- Upper Emerald Pool: The farthest destination, set beneath towering rock walls. The final section is steeper and rougher than the lower route.
Distances depend on the route and trail access. Many visitors plan roughly one to three miles round trip, with additional time needed for stops, photos, and changing conditions.
Scenery and Seasonal Water
Along the way, hikers pass sandstone cliffs, desert plants, and shaded canyon pockets. Water flow varies with the season and recent weather, so the pools may look different from one visit to the next. After rain or snowmelt, small waterfalls can appear along the cliffs; during drier periods, the flow may be limited.
The pools are delicate natural environments. Do not swim or wade in them, and avoid disturbing plants, wildlife, or stream banks. Staying on the marked trail helps protect the area and reduces erosion.
Planning Your Hike
The trailhead is near Zion Lodge in Zion Canyon. During much of the year, access to the canyon’s scenic drive is managed by the park shuttle, and parking is limited. Check the National Park Service website for current shuttle schedules, road access, trail closures, and alerts before your visit.
Wear sturdy shoes, bring drinking water, and allow extra time in hot weather. Much of the route can be exposed to sun, while slick rock and muddy sections may occur after precipitation. Avoid hiking during thunderstorms or when flash-flood risks are present; never enter a canyon or stream channel when storms are nearby.
A Rewarding Zion Hike
Whether you choose a short walk to the Lower Emerald Pool or continue uphill to the Upper Pool, this trail combines classic Zion scenery with a satisfying destination. With preparation, respect for the park’s rules, and attention to current conditions, Emerald Pools Trail can be a highlight of a visit to Zion National Park.
7 Essential Tips for Hiking the Emerald Pools Trail in Zion National Park
- Check Zion shuttle schedules before you go.
- Start early to avoid crowds and heat.
- Wear sturdy shoes with good traction.
- Carry water, especially in warm weather.
- Choose a route that matches your fitness level.
- Stay on marked trails to protect fragile plants.
- Keep away from wet, slippery edges.
Check Zion shuttle schedules before you go.
Check Zion shuttle schedules before you go, since access to the Emerald Pools Trail may depend on shuttle service in Zion Canyon. Routes, operating hours, and seasonal schedules can change, and parking near the trailhead is limited. Review the National Park Service’s latest updates so you can plan your arrival and avoid unnecessary delays.
Start early to avoid crowds and heat.
Start your Emerald Pools Trail hike early in the morning to enjoy cooler temperatures and fewer people on the path. An early start can make the climb more comfortable, give you a quieter experience at the pools, and leave more time to explore Zion National Park later in the day. Check current trail and shuttle information before you go, and bring plenty of water.
Wear sturdy shoes with good traction.
Wear sturdy shoes with good traction on the Emerald Pools Trail. The route can include uneven surfaces, rocky steps, and slick or muddy sections, especially after rain, so supportive footwear can help you stay comfortable and maintain your footing.
Carry water, especially in warm weather.
Carry plenty of water when hiking the Emerald Pools Trail, especially in warm weather. The route can be sunny and strenuous, and there may be few convenient places to refill, so bring enough for the entire hike and drink regularly rather than waiting until you feel thirsty.
Choose a route that matches your fitness level.
Choose a route that matches your fitness level when hiking Emerald Pools Trail. The Lower Emerald Pool is a shorter, easier option, while continuing to the Middle and Upper pools adds distance, elevation gain, and rougher terrain. Check current trail conditions before you go, and remember that you can turn back whenever needed.
Stay on marked trails to protect fragile plants.
Stay on marked trails when hiking Emerald Pools Trail to protect fragile plants and prevent erosion. Even small shortcuts can damage vegetation that takes years to recover, so follow signs and established paths throughout your visit.
Keep away from wet, slippery edges.
Stay well back from wet, slippery edges along the Emerald Pools Trail. Rocks near waterfalls and pools can be slick, and a misstep could lead to a serious fall. Keep to the marked path, watch your footing, and enjoy the views from a safe distance.
